Wednesday 23 December 2015

Christmas Card Series 2015 - Card #9

Hi!
Welcome to Day 9 as well as the last day of my Christmas Card Series for this year. Due to my poor planning, I wasn't able to make 12 Christmas cards in time this year. I will try to do better next year!

So here's the last card for this year and I used the stamps which I bought during my trip to Japan. It is so stinking cute!


I made the card base using Neenah Solar White cardstock, scored and folded in half. I then stamped the snowflakes in Hero Arts Unicorn White pigment ink all over the card front. If you look closely, you will be able to see the adorable soot sprites (that's the reason I bought this little stamp) from Studio Ghibli's My Neighbor Totoro and Spirited Away among the snowflakes.


I stamped the Totoro image onto Neenah Solar White cardstock in Memento Tuxedo Black ink and colored them in with Copics. I then die cut the image using My Favorite Things Circle Stax One dies and adhered it onto the Simon Says Stamp Green Apple piece which I have die cut from Lawn Fawn Scalloped Circle Stackable dies set.

I adhered the scalloped circle to the card front using some glue tape. I then stamped the "Merry" sentiment from Mama Elephant Polar Pals stamps set onto the Totoro image because I feel it is too bare up top. Lastly, I popped the sentiment which I stamped from Lawn Fawn Joy to the Woods stamps set on some foam tape before adhering it under the image.

That's all for the update today.
Thanks for stopping by and I wish everyone "Merry Christmas and Happy New Year!!!". I will see you again next year!

Tuesday 22 December 2015

Christmas Card Series 2015 - Card #8

Hi!
Welcome to Day 8 of my Christmas Card Series. 

Today's card is quite simple. I made the card base using Neenah Solar White cardstock, scored and folded in half. I die cut a circle from the card base using Simon Says Stamp Stitched Circles dies set and trimmed off 1" from the bottom part of the card front.


I cut a piece of 5 1/2" x 4 1/4" Neenah Solar White cardstock and adhered some pattern paper onto it. The pattern papers are from Lawn Fawn Snow Days paper pack. I adhered the piece with pattern papers behind the card front. I stamped the penguin images in Memento Tuxedo Black and colored them in with Copics before die cutting them out using the coordinating dies. The images and sentiments are from Mama Elephant Polar Pals stamps set.


I finished the card by tying some jute string around the card front and added some Wink of Stella Clear Glitter to the stars.

That's all for the update today.
Thanks for stopping by and drop by again tomorrow for Card #9.

Monday 21 December 2015

Christmas Card Series 2015 - Card #7

Hi!
Welcome to Day 7 of my Christmas Card Series. Sorry that this post is only up today instead of yesterday because I was too tired.

Today's card is a round card base. I made it using 2 pieces of Neenah Desert Storm cardstock which I die cut using My Favorite Things Circle Stax One die. I scored 1/2" at the top of 1 of the circle piece and put adhesive on the 1/2" panel. I adhered the other circle piece on top and this completes the circle card base.


I stamped the Christmas tree from Mama Elephant Cozy Christmas stamps set in Hero Arts Unicorn White pigment ink and colored the tree using color pencils. I stamped Mr & Mrs Santa from the same stamps set in Memento Tuxedo Black ink and colored them in with Copics before die cutting them with the coordinating dies.


I adhered Mr & Mrs Santa to the card base using some glue tape. I also stamped, colored and die cut the gloves, present and cup of hot cocoa. I adhered those pieces using glue tape and foam tape for dimension. I finished the card by stamping the sentiment from Lawn Fawn Joy to the Woods stamps set in Hero Arts Unicorn White pigment ink. I went over the sentiment and the Christmas tree with a Uniball Signo White gel pen because I felt that the white ink is too dull. I also added some faux stitch line around the card with the same gel pen.

That's all for the update today.
Thanks for stopping by and drop by again tomorrow for Card #8.

Saturday 19 December 2015

Christmas Card Series 2015 - Card #6

Hi!
Welcome to Day 6 of my Christmas Card Series. Today's card is a white on white card with just a touch of colour.


The layers are follows:
  1. Card base: 4 1/4" x 11" Neenah Solar White, scored and folded in half
  2. Background piece: 3 3/4" x 5" Neenah Solar White, I used Wendy Vecchi embossing paste and Simon Says Stamp Falling Snow stencil to create the background. I added some Wink of Stella Clear Glitter onto the falling snow once the paste is dried.
  3. Sentiment piece: Die cut from Lawn Fawn Large Stitched Rectangle die set (second largest, if I'm not mistaken). I stamped the medallion images from Stampin' Up Daydream Medallions stamps set in Stampin' Up Soft Sky, Bermuda Bay, Simon Says Stamp Fog and Smoke ink. The sentiment is from Stampin' Up Delightful Dozen stamps set in Versafine Black Onyx ink.
Card Assembly:
I tied a bow using some white sheer ribbon around the background piece before adhering it to the card base using glue tape. I popped the sentiment piece up on a piece of foam sheet that is slightly smaller then the sentiment piece and adhered it onto the background piece. Lastly, I finished the card by adding a big, clear rhinestone in the center of the medallion image.


That's all for the update today.
Thanks for stopping by and drop by again tomorrow for Card #7.

Friday 18 December 2015

Christmas Card Series 2015 - Card #5

Hi!
Welcome Day 5 of my Christmas Card Series.

Today I CASED another card from a pin on Pinterest. I like the colour combination and the simplicity of it.

Here's the card on Pinterest:


And here's my version of it:


I used Neenah Desert Storm cardstock for the card base and Neenah Solar White cardstock for the card front. I trimmed the Solar White piece at 3 3/4" x 5 1/2" so that it will show a 1/4" border of the card base on each side.

I die cut the snowflakes using Simon Says Stamp Melody Snowflake die and popped the Solar White panel using some foam tape. Before I adhere the panel to the card base, I cut some cardstock pieces from Simon Says Stamp Sunshine, Green Apple and Stampin' Up Strawberry Slush to layer behind the negative space of the snowflakes.

I stamped the sentiment from Simon Says Stamp Peace On Earth stamps set onto some Simon Says Stamp Sea Glass cardstock and die cut it using Lawn Fawn Small Stitched Rectangle die set. I finished the card by adhering a bow on top of the sentiment piece.


That's all for the update today.
Thanks for stopping by and drop by again tomorrow for Card #6.

Thursday 17 December 2015

Christmas Card Series 2015 - Card #4

Hi!
Welcome to Day 4 of my Christmas Card Series.

I saw a card on Pinterest and I really liked how the trees looked suspended on the card front so I decided to CASED the card.

Here's the card I saw on Pinterest:


And here's my version of it:


I first started with a piece of 8 1/2" x 5 1/2" Simon Says Stamp Schoolhouse Red cardstock, scored and folded it in half. I then cut out 2 1/4" x 5 1/2" from the center of the card front. This will leave a 1" x 5 1/2" tab on the card front and a loose strip of 1" x 5 1/2" cardstock. I cut 2 strips of 3/4" x 5 1/4" from some pattern paper and adhered them to the top and bottom. 

I stamped the medallion image twice, offsetting the image during the second stamping to create a wreath image. The medallion image is from Stampin' Up Daydream Medallions stamps set. The ink colours used for the image are Simon Says Stamp Green Leaf and Versafine Spanish Moss. I die cut the image using the coordinating die from Stampin' Up and a circle from the center of the image using My Favorite Things Circle Stax One. I made 2 sets of this wreath die cut.

I then die cut a circle slightly bigger than the circle of my wreath piece from a piece of acetate. I then adhered the wreath pieces together, sandwiching the acetate piece in between onto the card front. I die cut the word die twice from some pattern paper from Lawn Fawn Scripty Joy die. I adhered the word onto the front side of the acetate and the other piece behind to cover up the adhesive.


I finished the card by tying a small bow using red satin ribbon and adhering it to the top of the wreath, some red rhinestones all around the wreath and a piece of Neenah Solar White cardstock inside the card for message.

That's all the update for today.
Thanks for stopping by and drop by again tomorrow for Card #5.

Wednesday 16 December 2015

Christmas Card Series 2015 - Card #3

Hi!
Welcome to Day 3 of my Christmas Card Series. This post is supposed to be up last Wednesday but due to some problems with the internet connection, it has been delayed.

So here's card #3:


I first cut a piece of 8 1/2" x 5 1/2" Simon Says Stamp Schoolhouse Red Cardstock, scored and folded it in half for my card base. I then trimmed the edge of the card at an angle. I cut 2 strips of cardstock using Simon Says Stamp Green Apple and Neenah Desert Storm.

I die cut different pattern papers using Simon Says Stamp Brilliant Gifts die, mixed and matched the pieces together to create this colourful row of presents. I stamped the sentiment from Lawn Fawn Joy to the Woods stamps set using some metallic gold ink.

I drew some faux stitched lines around the red portion with a Uni-ball Signo Gold Pen and finished the card off with 3 clear rhinestones at the bottom left corner.


That's all the update for today.
Thanks for stopping by and drop by again tomorrow for Card #4.

Tuesday 8 December 2015

Christmas Card Series 2015 - Card #2

Hi!
Welcome to Day 2 of my Christmas Card Series for year 2015. Today I made a simple card that involves some partial die cutting.


I used Simon Says Stamp Sea Glass Cardstock for my base. I selected 3 different snowflake dies and they are Simon Says Stamp Eliza, Abby & Melody Snowflake dies. I die cut them partially to create a border on a piece of Neenah Solar White Cardstock. I did a very sloppy job at partial die cutting that the cut lines exceeded the pencil line that I drew to mark where I had wanted the cutting to stop. So I covered it up with a small strip of pattern paper from Lawn Fawn Snow Day Paperpack.


I then finished the card with a sentiment from Lawn Fawn Joy to the Woods and adhered 3 pink rhinestones just below the sentiment.

That's all for the update today.
Thanks for stopping by and drop by again tomorrow for Card #3.

Monday 7 December 2015

Christmas Card Series 2015 - Card #1

Hi!
I know it's been ages since I last updated my blog. I am not going to bore you with the details of why I went under the radar for so long. I am here to bring you my latest update, the Christmas Card Series for year 2015. I know it is up later than previous years but better late than never. So without further ado, let's get on with the first card of this year's series.


I have always seen designers making scene cards and had wanted to try them too but let me tell you, it is a lot of work. It took me some time to put together this card but I liked how it turned out.

First, I did all the stamping and colouring of the images. Then, I die cut them out using the coordinating dies. I used the stamp and dies from Lawn Fawn Snow Day. I die cut a piece of Simon Says Stamp Sea Glass Cardstock using Lawn Fawn Large Stitched Rectangle die and created the falling snow background using Simon Says Stamp Falling Snow Stencil and Wendy Vecchi Embossing Paste.

I die cut the snow slopes using Lawn Fawn Stitched Hillside Borders die from some Neenah Solar White Cardstock. 
 

I then build up my scene with layers of foam tape to make them pop. The sentiment is from the same stamps set. I inked and stamped them separately to create the sentiment in a single line (originally the sentiment is in 2 lines).

That's all for the update today. Thanks for stopping by and drop by again tomorrow for Card #2.

Sunday 22 March 2015

Make A Wish

Hello!
I actually do not have a plan or particular design for today's card. I just thought that I wanted to make a simple one layer card.

So here's the card for today.


It is a very, very simple card isn't it? 

I first cut a piece of 4 1/4" x 11" Neenah Solar White cardstock, scored and folded it in half. I stamped the sentiment from Mama Elephant Make A Wish stamp set in some Versafine Black Onyx ink and heat embossed it with American Crafts Clear Embossing powder.

I then drew some curve lines onto some post-it tape and cut them out. I used them as mask and place them around the embossed sentiment. I used the circle stamps from Simon Says Stamp Lot of Dots stamp set and stamped them randomly with Hero Arts Bubblegum, Orange Soda, Butterbar, Green Hills and Cornflower inks. I peeled off the masks and voila! My card is done.

That's all for the update today.
Thanks for stopping by and check in again on Wednesday for another update!!!


Wednesday 18 March 2015

Cupcake + Bunny

Hi!
I am so in love with Mama Elephant products that I just can't stop at making only 1 card with them. Today I made a very simple birthday card showcasing Mama Elephant Carnival Cupcakes stamp set.

Here's how it looks like:


I started by prepping my card base. I cut a 4 1/4" x 11" piece of Neenah Solar White cardstock, scored and folded it in half. I then die cut another piece of Neenah Solar White cardstock using the largest rectangle from Lawn Fawn Small Stitched Rectangle die set.

I stamped the bunny and the cupcake onto the rectangle piece. At this point, I didn't mask off the bunny since I will be die cutting them out. I stamped another bunny onto some post-it tape and cut it out to create a mask.

I first die cut the bunny out from the rectangle piece, place the rectangle piece in the center of my card base and lightly trace the negative space with a pencil. This serves as a guide so I know where to stamp the bunny so the image is centered on my card base. I did the same for the cupcake image as well. I used the mask that I created earlier and mask off the bunny before stamping the cupcake over it.

I then colored the images in with Copics. I applied some Wink of Stella Clear glitter all over the colored image. I colored the pearls with a yellow Copic marker before adhering them to the cupcake. I popped the whole rectangle piece up with foam tapes and adhered it to my card base.

I die cut the word " Happy Birthday" twice from some red cardstock using Simon Says Stamp Happy Birthday die and glued them together before adhering it across the rectangle piece. Again, I do not quite like the amount of white spaces around the card so I adhered some Pretty Pink Posh Summer Mix sequins just to fill in some of the white spaces. Lastly, I added some dots of Ranger Glossy Accent here and there.

That's all for my update today. I hope that you like my card.

Thanks for stopping by and check back on Sunday for a new update.

Sunday 15 March 2015

Things That Fly

Hi!
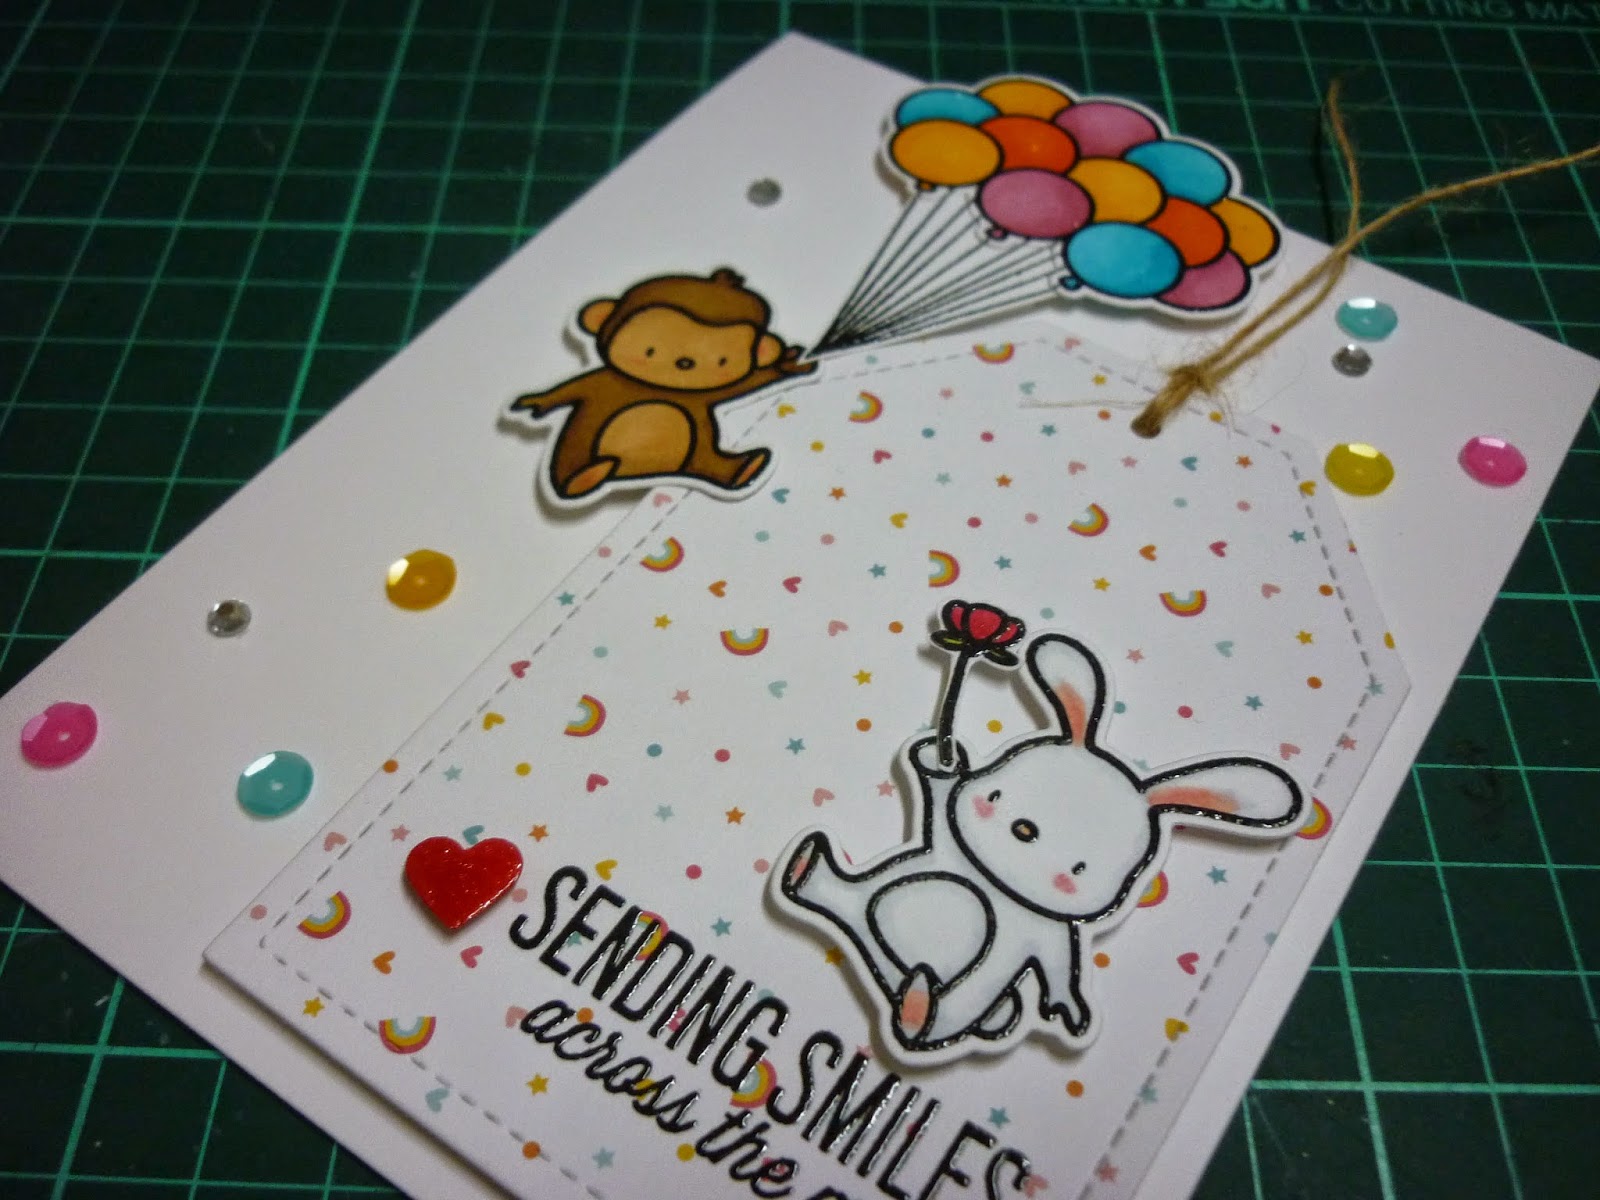
It's been a while since I last blogged and also a while since I last participated in Simon Says Stamp Wednesday Challenge. This week's theme is "Things That Fly" so I made a very simple card using Mama Elephant Up & Away set.

Here's how it looks like:


I first prepped my card base by cutting a 4 1/4" x 11" piece of Neenah Solar White cardstock, scored and folded it in half. I then die cut the tag from some Lawn Fawn Hello Sunshine pattern paper using Pretty Pink Posh Stitched Duo 1 die.

I stamped the images from Mama Elephant Up & Away stamp set in some Versafine Black Onyx ink and heat embossed them with American Crafts Clear embossing powder. I colored the images in with Copics and die cut them out with their coordinating dies. I stamped the sentiment from the same stamp set in Versafine Black Onyx ink and heat embossed it with American Crafts Clear embossing powder.

I popped the tag on some foam tapes and adhered it to the lower right corner of my card base. I then adhered all the images onto the card base with foam tapes as well. I do not like the white spaces around the images so I added some Pretty Pink Posh Summer Mix sequins and some rhinestones to fill in the white spaces.

That's all the updates for today.
Thanks for stopping by and drop by again on Wednesday for another update.

Friday 13 February 2015

Break for Chinese New Year

Hi!
I will be taking a long break for Chinese New Year so there will be no updates for some time. I would like to take this opportunity to wish all my friends "A Very Happy and Prosperous Chinese New Year". HUAT AH!!!

Thursday 5 February 2015

Chinese New Year 2015 Card Series - Card #10

Hi!
Welcome to Day 10, which is also the last day of my Chinese New Year Card Series for this year. Today's card is not your typical Chinese New Year card as I did not use any reds or golds for it. Many might find it dull and not as lively as a Chinese New Year card would be but I still like it none the less. Please feel free to let me know if you like it or hate it. Your comments help me to grow as a card maker.

Here's how it looks like:


I first prepped my card base by cutting a 4 1/4" x 11" piece of lavender cardstock, scored and folded it in half. I drew some faux stitched lines around the edge of the card using Signo Uniball White Gel Pen.

I die cut a piece of ivory cardstock and a piece of clear acetate using the largest rectangle from Lawn Fawn Small Stitched Rectangle die set. I stamped the splatter images from Stampin' Up Gorgeous Grunge stamp set onto the ivory piece in some Versafine Imperial Purple and Simon Says Stamp Lavender inks. I then die cut the ivory piece and a piece of lavender cardstock using Simon Says Stamp Butterfly Tendrils die.

As the ivory piece is slightly shorter than the die, I lined the die to the edge of the ivory piece and ran it through the Big Shot. I used only the right portion of the ivory piece and adhered it to the acetate piece with some glue tape. I then inlay the lavender die cut piece into the negative space of the ivory piece using some liquid glue. I hope it makes sense to you what I'm trying to explain above but if it does not, you can watch this tutorial over at Simon Says Stamp Youtube Channel. I CASED this card from Shari Carroll. Though the steps are a little different but it gives sort of the same result.

I cut a strip of pattern paper from Lawn Fawn Hello Sunshine paper pack and lined it up behind the acetate piece so that design will be shown through before adhering it down. I popped the whole piece up on foam tape and adhered it to the card front. I die cut the "Happy" sentiment 4 times from some ivory cardstock and once from the same pattern paper using Simon Says Stamp Happy die. I adhered all 5 layers together with some liquid glue to give the die cut sentiment a chipboard look.

I stamped the "Chinese New Year" sentiment on a strip of dark grey cardstock using Lawn Fawn Smitty's ABCs stamp set in some Versamark ink and heat embossed it with American Crafts Silver Embossing powder. I flagged one end of the strip using a 1 1/4" square punch and adhered it to the bottom right corner with some glue tape. I then adhered the die cut sentiment above the strip. I finished off the card by adding some Clear Wink of Stella Glitter to the butterflies.

That's all for the update today.
Thanks for stopping by and do drop by again for more updates.


Wednesday 4 February 2015

Chinese New Year 2015 Card Series - Card #9

Hi!
Welcome to Day 9 of my Chinese New Year Card Series. Today I made another shaker card and the theme is all about butterflies.

Here's how it looks like:


I first prepped the card base by cutting a 5 3/4" x 9" piece of red cardstock, scored and folded it in half. I then die cut the rectangle from some ivory card stock using the largest rectangle from Lawn Fawn Large Stitched Rectangle die set.

I stamped the splatter images from Stampin' Up Gorgeous Grunge stamp set in Stampin' Up Real Red, Melon Mambo and Strawberry Slush inks onto the ivory piece . I then die cut the piece using Simon Says Stamp Butterfly Drift die. I also die cut some gold cardstock using the same die. I cut a piece of clear acetate and adhered it to the back of the ivory piece. I then adhered the outline portion of the gold die cut onto the ivory piece.

I die cut another piece of ivory cardstock using the same rectangle die for the background of my shaker part. I also stamped the splatter images using the same inks and stamp set. I used some Pretty Pink Posh Classic Christmas Mix for the shaker elements. I glued some of the sequins onto the background piece using Rangers Glossy Accent so that the sequins are still visible when the card is propped up.

I then assembled the shaker portion and adhered it to the card front using some glue tape. I stamped the sentiments using Simon Says Stamp Happy stamp set and Lawn Fawn Smitty's ABCs in Versamark and heat embossed it with American Crafts Gold Embossing powder onto some red cardstock. I adhered it to the lower right corner of the card. I then used the butterflies die cut from the Butterfly Drift die and decorated the front of the card. I also added some pearls to the body of butterflies.

That's all for the update today.
Thanks for stopping by and do drop by again tomorrow for last card of this series, Card #10.

Tuesday 3 February 2015

Chinese New Year 2015 Card Series - Card #8

Hi!
Welcome to Day 8 of my Chinese New Year Card Series. Today's card is almost the same as Card #4 as I have made an additional piece when I was doing the stencil stamping so in order not to waste it, I used it for Card #8.

Here's how it looks like:


I first prepped my card base by cutting a 4 1/4" x 11" piece of lavender cardstock, scored and folded it in half. I drew some faux stitched lines around the edge of the card using Signo Uniball White Gel Pen.

For the ivory piece, I die cut it using the largest rectangle from Lawn Fawn Small Stitched Rectangle die set. The stencil I made using an image that I printed out from the web. I stamped the stars from Simon Says Stamp Lots of Stars stamp set in Hero Arts Bubblegum, Butter Bar, Orange Soda, Green Hills and Cornflower inks.

I stamped the word "Happy" from Simon Says Stamp Happy stamp set and the words "Chinese New Year" from Lawn Fawn Smitty's ABCs stamp set in some Versamark ink. I heat embossed the sentiments using American Crafts Gold Embossing powder. I stamped the flower images from Stampin' Up Petite Flowers and Flower Shop stamp sets in Hero Arts Butter Bar and Bubblegum inks. I then punched them out using their coordinating punch.

I popped the ivory piece up with some foam tape and adhered it to the card front. I then adhered the flowers with some foam squares and finished the card off by adding some pearls to the center of the smaller flowers.

That's all for the update today.
Thanks for stopping by and do drop by again tomorrow for Card #9.

Monday 2 February 2015

Chinese New Year 2015 Card Series - Card #7

Hi!
Sorry for missing updates for several days. I was busy with some personal stuff so I need to get those off my shoulders before I can get back to updating my blog. Today's card is a very simple shaker card and I hope you like it.

Here's how it looks like:


I first prepped the card base by cutting a 5 1/2" x 8 1/2" piece of red cardstock, scored and folded it in half. I rounded all the corners with We Are Memory Keepers 1/2" Corner Chomper and drew some faux stitched lines around the edge of the card using Signo Uniball White Gel Pen.

I die cut 2 pieces of brown cardstock, 1 piece of Neenah Solar White cardstock and 1 piece of clear acetate using Pretty Pink Posh Stitched Duo 1 die set. This will be the shaker part of my card. I also die cut the branch from some brown cardstock using Spellbinders Cherry Blossom die set and adhered it to the Solar White piece. 

I then adhered some Pretty Pink Posh Pink Peonies and Marshmallow sequins to the branch to make them look like cherry blossoms. I assembled the shaker part and put in some Pink Peonies and Marshmallow into the cavity before sealing it. I then adhered it to the center of the card front using some glue tape.

I stamped the little boy and girl from Mama Elephant In My Heart stamp set in some Memento Tuxedo Black ink and colored them in with Copics before hand-cutting them out. I die cut the banner from some ivory cardstock using Simon Says Stamp Small Banners die set. I wrote the sentiment using a gold gel pen and drew some faux stitched line around the banner using a black gel pen.

I adhered the images and banner on top of the shaker with some glue tape and tied a double bow using some jute strings before adhering it to the top of the shaker. I finished the card off by adding some Clear Wink of Stella Glitter to the little boy and girl's hair.

That's all for the update today.
Thanks for stopping by and do drop by again tomorrow for Card #8.

Wednesday 28 January 2015

Chinese New Year 2015 Card Series - Card #6

Hi!
Welcome to Day 6 of my Chinese New Year 2015 Card Series. Today's card is my second favorite of this series because it features the little goat from Card #3. It also has the little boy and girl from Card #5.

Here's how it looks like:


I first prepped the card base by cutting a 5 1/2" x 8 1/2" piece of red cardstock, scored and folded it in half. I rounded all the corners using We Are Memory Keepers 1/2" Corner Chomper. I then die cut the ring frame thrice from some brown cardstock, thrice from some pattern papers and once from some Neenah Solar White cardstock using Simon Says Stamp Ring Frame die.

I stamped the little boy and girl from Mama Elephant In My Heart stamp set and the goat from Simon Says Stamp Birthday Farm Animals in some Memento Tuxedo Black ink. As I did before in Card #3 and #5, I altered the images a little to make them fit to the Chinese New Year theme. I then colored them in Copics and cut them out.

I adhered 3 layers of the brown frame together with some liquid glue before adhering it onto the card front. I adhered the pattern papers into the negative spaces of the frame with some glue tape. I stamped the word "Happy" from Simon Says Stamp Happy stamp set onto the Neenah Solar White piece in some Versafine Smoky Gray ink. I then wrote the words "Chinese New Year" using Stampin' Up Strawberry Slush marker. I added some faux stitched line around the circle using a black gel pen before adhering it onto the card.

I popped the little children and goat on some foam squares. I drew some faux stitched lines around the card front with a white gel pen and finishes off the card by applying some Clear Wink of Stella Glitter to the images.

That's all the update for today.
Thanks for stopping by and do drop by again tomorrow for Card #7.

Tuesday 27 January 2015

Chinese New Year 2015 Card Series - Card #5

Hi!
Welcome to Day #5 of my Chinese New Year 2015 Card Series. Today's card is very simple and it does not look like your conventional Chinese New Year Card but I still like it none the less. As I mentioned in my previous updates that I bought some new craft items so I am eager to try them.

Here's how the card looks like:


I first cut a 4 1/2" x 4 1/2" piece of Neenah Desert Storm cardstock, scored and folded it in half for my card base. I then die cut stitched square frames thrice from some red cardstock using the largest square from Simon Says Stamp Stitched Squares die set. I adhered all 3 frames together with some glue tape.

I die cut the grass from some green cardstock using Lawn Fawn Grassy Border die and adhered them behind the square frame. I then used my fingers to gently bend the grass to make them look more natural. I die cut some clouds from Lawn Fawn Hello Sunshine paper pack using Lawn Fawn Spring Showers die set.

I stamped the little girl and boy from Mama Elephant In My Heart stamp set in some Memento Tuxedo Black ink. I then drew some line on the boy's clothes to make them look like traditional Chinese clothes before coloring the images in with Copics.

I adhered 2 of the clouds to the card front before adhering the frame on top of it. I popped the last cloud on some foam squares and adhered on top of the frame. I tucked the little boy and girl between the grass and adhered them with some foam squares. Lastly, I stamped the sentiment using Lawn Fawn Smitty's ABCs in some Versafine Smoky Gray ink. I finished the card off by applying some Clear Wink of Stella Glitter to the clouds and children's hair.

That's all for the update today.
Thanks for stopping and do drop by again tomorrow for Card #6.

Monday 26 January 2015

Chinese New Year 2015 Card Series - Card #4

Hi!
Sorry that I have not been updating my card series lately. Been busy with work so I had no choice but to put off the updates for a few days. Now that the workload has lighten a little, I am back with my Card #4.

Here's how the card looks like:


This card is slightly bigger than the normal 4 1/4" x 5 1/2" card because I do not want the card to be all white or ivory in this case.

I first cut a 5 3/4" x 9" piece of red cardstock, scored and folded it in half as my card base. I then die cut some ivory cardstock using the largest rectangle from Lawn Fawn Large Stitched Rectangle die set. I made a stencil using the image I printed out from the net and stamped the stars from Simon Says Stamp Lots of Stars stamp set in Hero Arts Butter Bar, Bubblegum, Orange Soda, Cornflower and Green Hills inks onto the ivory piece.

I stamped the sentiment using Lawn Fawn Smitty's ABCs stamp set in Versamark and heat embossed it with American Crafts Gold embossing powder. I then adhered the ivory piece to the red card base using glue tape.

I die cut the branch from some brown cardstock using Spellbinder Cherry Blossoms die set and adhered it to the top left corner of the ivory piece. I punched some cherry blossoms from some colored papers and adhered them to the branch. I used the stylus to make the cherry blossoms curled up and this gives the cherry blossoms a 3D look.

That's all for the update today.
Thanks for stopping by and do drop back again tomorrow for Card #5.

Saturday 17 January 2015

No updates

Hi!
I am supposed to upload my Chinese New Year Card #4 today but I was busy with work yesterday and I am out of town this weekend so I did not manage to make a card.

My apologies for this and I promise I will update it by next Monday.

Thank you!!

Friday 16 January 2015

Chinese New Year 2015 Card Series - Card #3

Hi!
Welcome to Day 3 of my Chinese New Year Card Series. Today's card is my favorite of all 3 designs at this moment. Originally, the image is meant for birthdays but I made some changes to it to make it look more like Chinese New Year themed.

Here's how it looks like:


I first cut a 5 1/2" x 8 1/4" piece of Neenah Desert Storm cardstock, scored and folded it in half for my card base. I then cut a 5 1/4" x 4" piece of pattern paper and adhered it to the card front with some glue tape.

I stamped the goat image from Simon Says Stamp Birthday Farm Animals stamps set 3 times in Memento Tuxedo Black ink and colored them in with Copics. The original image had a cupcake on top of his head. I cut the top off and drew my own images and colored them in. I then applied some Clear Wink of Stella Glitter onto the goats for some added bling and set them aside.

I cut a strip of beige cardstock, stamped the sentiments using Lawn Fawn Smitty's ABCs stamps set with some Versafine Satin Red ink on it and adhered it onto the card front. I then die cut some Neenah Desert Storm cardstock using Waffle Flower Flower Circles die set and adhered the outer flower and circle portion on top of the card. I die cut the word "Happy" from some brown cardstock using Simon Says Stamp Happy die and adhered it above the stamped sentiments. I popped the goat on some foam tapes and adhered it in the center of the flower circle. Lastly, I finished the card off by adhering some pearls all around the flower.

That's all for the update today.
Thanks for stopping and do drop by again tomorrow for Card #4.