Hi!
Welcome to Day 24 of my Christmas Card Series. Today's card is very simple and almost like a one layer card. I said almost because in the end I can't help but put some layers here and there.
Here's how it looks like:


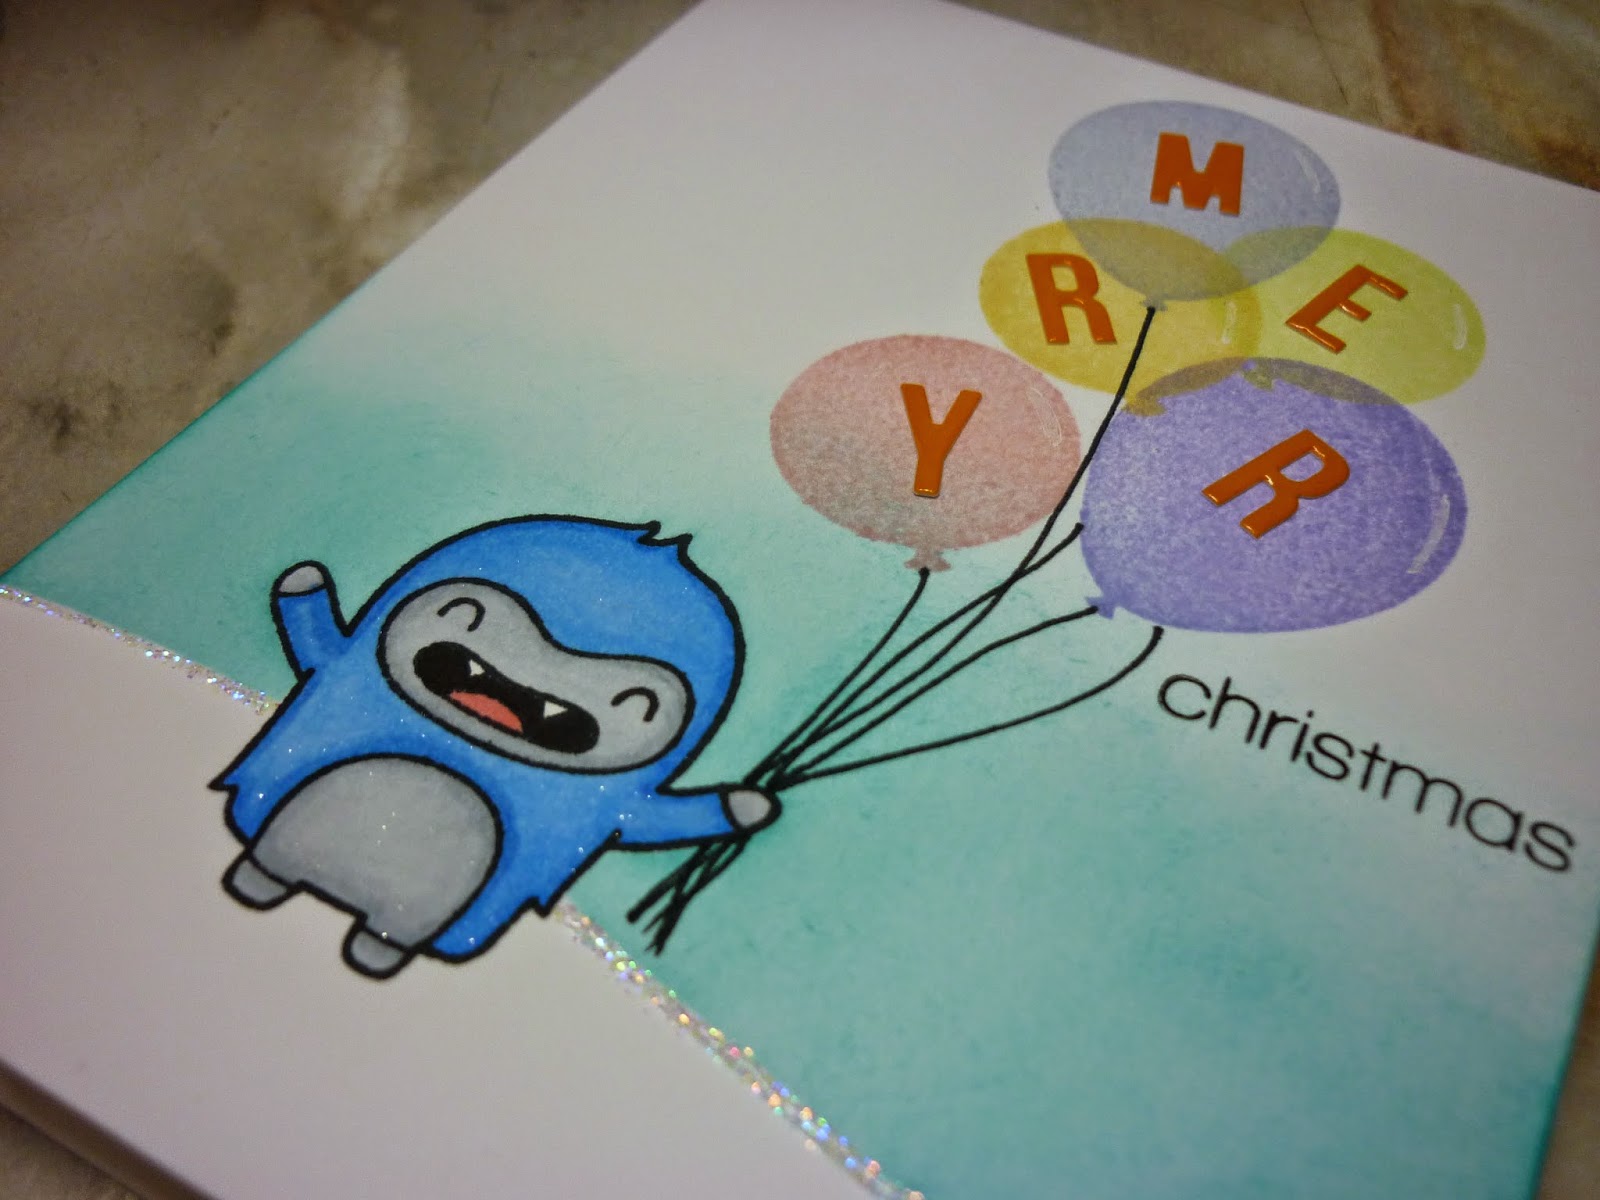
I first cut a piece of 4 1/4" x 11" Neenah Solar White cardstock, scored and folded it in half for my card base. I then stamped the Santa and dog from Paper Smooches Santa Paws stamps set in some Memento Tuxedo Black ink and colored them in with Copics.
I then made some masks for the Santa and dog using some post-it tape. I masked off the Santa, dog and the bottom part of the card before blending some VersaColor Polar Blue pigment ink all over the card. I peeled off the masks and added some Clear Wink of Stella Glitter to the white areas of Santa's hat, beard and clothes. I also added the glitter to the dog's hat and dog bone. I adhered some googly eyes to the Santa and dog.
I die cut the word "Happy" using Simon Says Stamp Happy die from some pattern paper thrice and stacked all of them together for added dimension. I adhered it to the top right corner before stamping the word "Christmas" in Versafine Onyx Black ink under it. I finished the card off by stamping some paw prints in Onyx Black ink around the die cut word and rounded all the corners with We Are Memory Keepers 1/2" Corner Chomper.
That's all for the update today.
Thanks for stopping by and check back again tomorrow for the last card of this year's Christmas Series. A big thanks to all those who have been following this series.